Summary
The Radiology List is populated with any Radiology bookings for the current day. To utilise the Radiology Daylist, a Radiology diary column needs to be created.
Details
The Radiology List can be accessed via the 'Day Lists' button from Primary Navigation on the left-hand side.

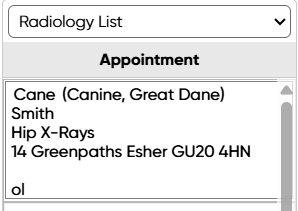
Once selected, the Radiology List will display.

Adding a Patient to the Radiology List
Add to Radiology List - From Treatment Screen
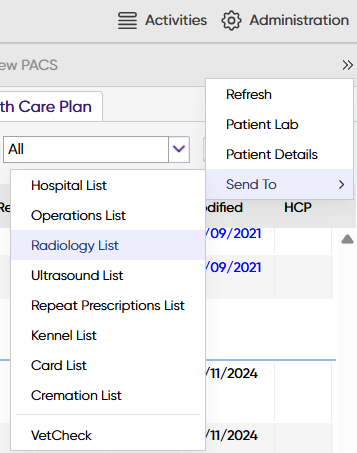
- From the Treatment screen, select the arrows in the top right of the screen. Select 'Send To' and select 'Radiology List'.
- This will send the patient onto the Radiology List for today's date.
Add to Radiology List - Dispensing Treatment
From the Treatment Screen, when adding a treatment, certain treatment codes can be configured to display a prompt to 'Send To Radiology List'.
Selecting 'Yes' to this prompt will send the patient onto the Radiology List for today's date.
Add to Radiology List - From the Diary Screen
In order to use this option, you will need to have a Radiology column setup in the Diary screen. Once this has been setup, you can add to the Radiology List via the Diary screen.
- Navigate to the Diary screen and locate the 'Radiology column'.
- Specify a 'reason' for the booking and save the 'appointment'.
- The entry will display in the Diary screen and on the 'Radiology' Day List.
Using the Radiology List
Selecting a patient from the list and right-clicking will display the below options:

Function | Description / Function | |
Set Priority | Priority levels 1-10. If set, this block of colour will show in the first column in the Radiology List. | |
Set Arrived | The appointment will change to RED within the Diary screen and Radiology List. | |
Set Failed to Show | Appointment will change to BLOCK GREY. | |
Set Cancelled | Cancels the appointment and the appointment will change to NEUTRAL BROWN. | |
Set Treated | The appointment will change to BLUE to indicate the client has been treated. | |
Set Paid | The appointment will change to GREEN to indicate the client has paid. | |
Appointment Memo | An 'M' will appear in the fourth column, indicating there is an additional note against this appointment. | |
Edit Appointment | Allows the user to edit the Appointment Reason and Note. | |
Delete Appointment | Allows the user to remove the appointment. This will remove from the Radiology List and Diary screen. | |
View Appointment Trail | Displays an audit trail for the selected appointment. | |
Send to Kennel | Sends the Patient to a Kennel. | |
| Send To VetCheck | Send the patient to VetCheck if the integration is in use. | |
| Arrive and Send To VetCheck |
| |
Clipper | Add the patient and client details to the Clipper. | |
Add Weight | Opens the Add Weight window. | |
Payments | Opens the Payments window. | |
Show Referrals | Shows the patient's registered referral details. | |
Consent | Opens the Consent form window. | |
View History | Displays the patient's Treatment history in a pop-up window. | |
View PACS | If the practice makes use of a cloud-based PACS system, selecting this option will show any uploaded images in a new tab. |
Exporting the Radiology List
The Radiology List can be printed, emailed or exported to CSV file.

