Summary
The Ultrasound List is populated with any Ultrasound bookings for the current day. To utilise this Daylist, a diary column needs to be created.
Details
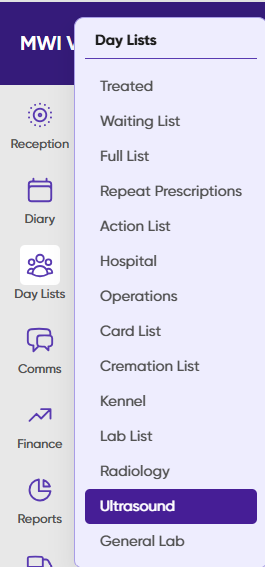
The Ultrasound List can be accessed via the 'Day Lists' button from Primary Navigation on the left-hand side.
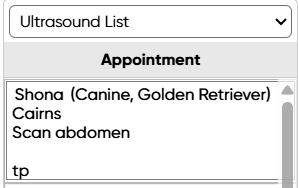
Once selected, the Ultrasound List will display:

Adding a Patient to the Ultrasound List
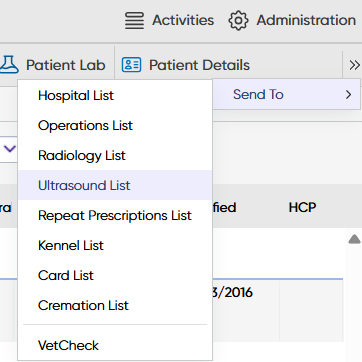
Add to Ultrasound List - From Treatment Screen
From the Treatment screen, select the arrows in the top right of the screen. Select 'Send To' and select 'Ultrasound List'.
This will send the patient to the Ultrasound List for today's date.
Add to Ultrasound List - Dispensing Treatment
From the Treatment Screen, when adding a treatment, certain treatment codes can be configured to display a prompt to 'Send To Ultrasound List'.
Selecting 'Yes' to this prompt will send the patient to the Ultrasound List for today's date.
Add to Ultrasound List - From the Diary Screen
Once the diary column has been setup, you can add to the Ultrasound List via the Diary screen.
Navigate to the Diary screen and locate the 'Ultrasound column'.
Specify a 'reason' for the booking and save the 'appointment'.
The entry will display in the Diary screen and on the 'Ultrasound' Daylist.
Diary:
Ultrasound List Functionality
Select a patient from the list and right click to display the below options:
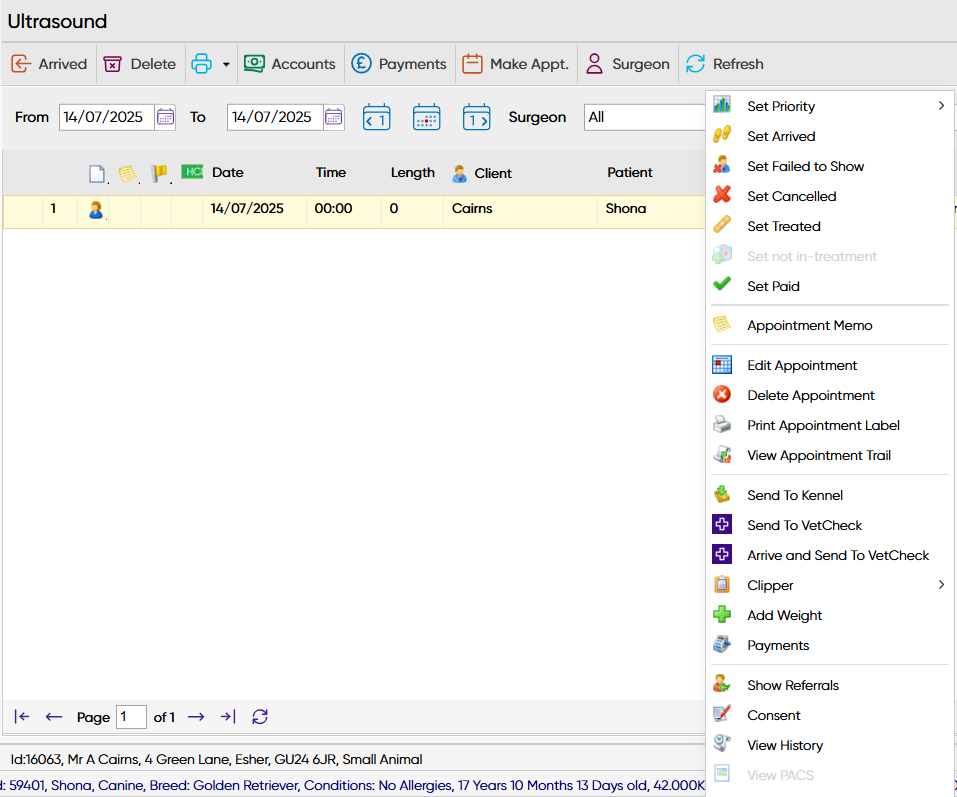
Function | Description / Function |
Set Priority | Priority levels 1-10. If set, this block of colour will show in the first column in the Ultrasound List. |
Set Arrived | The appointment will change to RED within the Diary screen and the Ultrasound List. |
Set Failed to Show | Appointment will change to BLOCK GREY. |
Set Cancelled | Cancels the appointment and the appointment will change to NEUTRAL BROWN. |
Set Treated | The appointment will change to BLUE to indicate the client has been treated. |
Set Paid | The appointment will change to GREEN to indicate the client has paid. |
Appointment Memo | An 'M' will appear in the fourth column, indicating there is an additional note against this appointment. |
Edit Appointment | Allows the user to edit the Appointment Reason and Note. |
Delete Appointment | Allows the user to remove the appointment. This will remove from the Ultrasound List and Diary screen. |
View Appointment Trail | Displays an audit trail for the selected appointment. |
Send to Kennel | Sends the Patient to a Kennel. |
| Send To VetCheck | Send the patient to VetCheck if the integration is in use. |
| Arrive and Send To VetCheck | Arrive the patient and send to VetCheck if the integration is in use. |
Clipper | Add the patient and client details to the Clipper. |
Add Weight | Opens the Add Weight window. |
Payments | Opens the Payments window. |
Show Referrals | Shows the patient's registered referral details. |
Consent | Opens the Consent form window. |
View History | Displays the patient's Treatment history in a pop-up window. |
View PACS | If the practice makes use of a cloud-based PACS system, selecting this option will show any uploaded images in a new tab. |
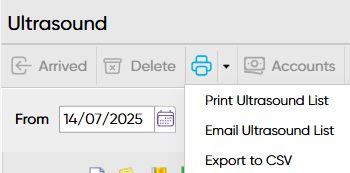
Exporting the Ultrasound List
The Radiology List can be printed, emailed or exported to CSV file.